How to create a simple Pricing Table for Carrd, with an annual price toggle
Recently I moved the landing page of Writings from the static template I was using to Carrd. It was possibly one of the best decisions in 2022 as it significantly lowered the maintenance cost.
Just like any other no-code builder, Carrd has a learning curve that you must go through to set all details in place especially if you want to precisely align your app design with the landing page. For example, there is a specific way how to make your pricing shown as a separate page, instead of a scrollable section on the same page. Once you learn this and other finesse, you will be able to build just any page you want.
Without much further ado and risking to present my post as marketing for Carrd, I want to show you what I did last for Writings.
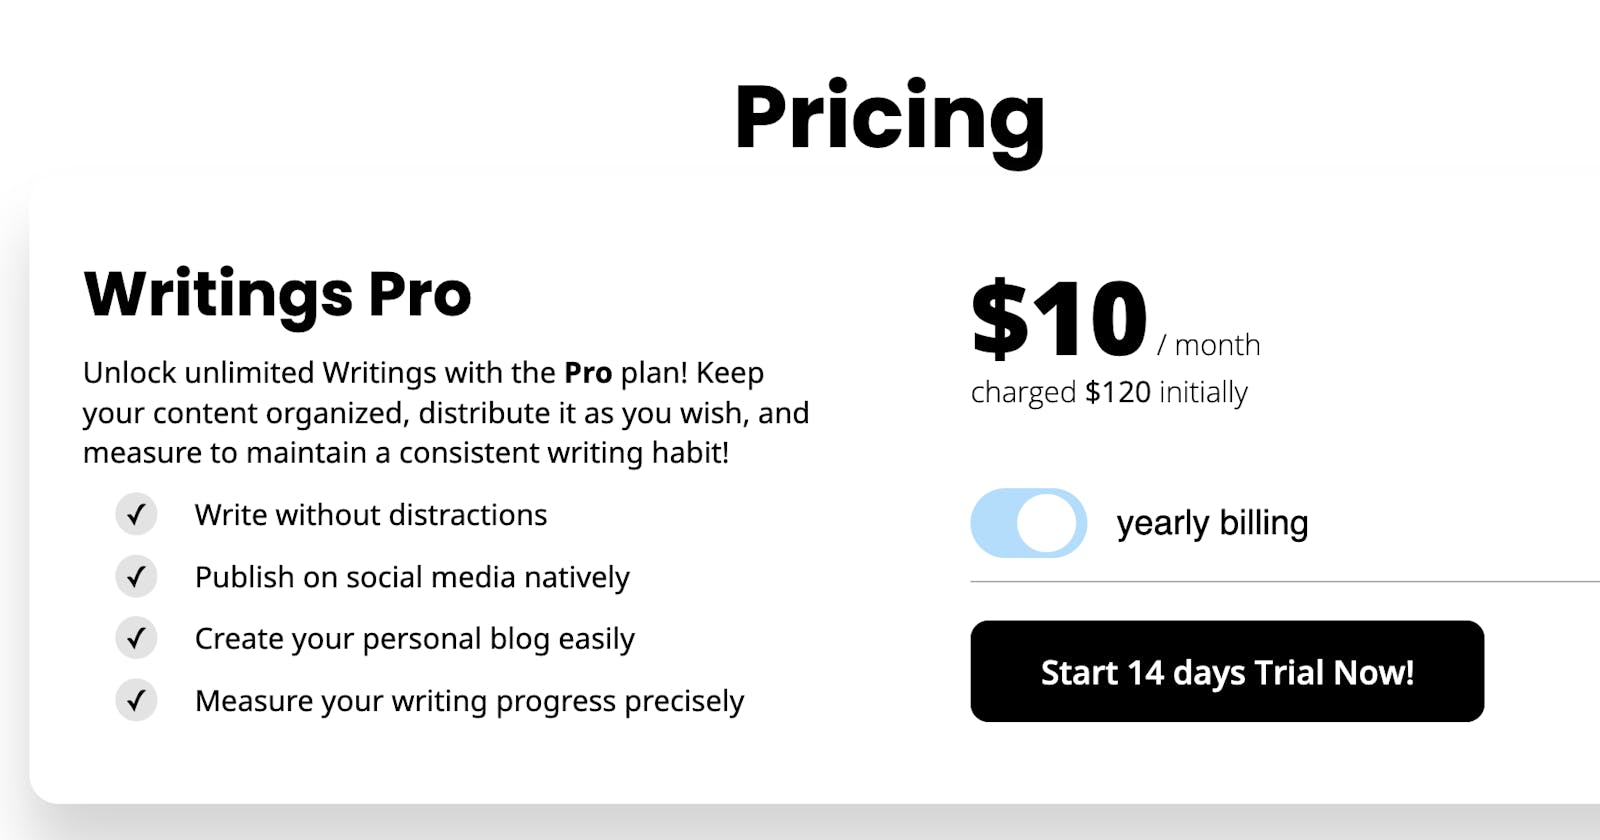
This pricing table I want to have:

There are a few great plugins that you can use to implement a clear and effective pricing table. And I suggest you first consider purchasing (or downloading, few of them are free), rather than building it yourself.
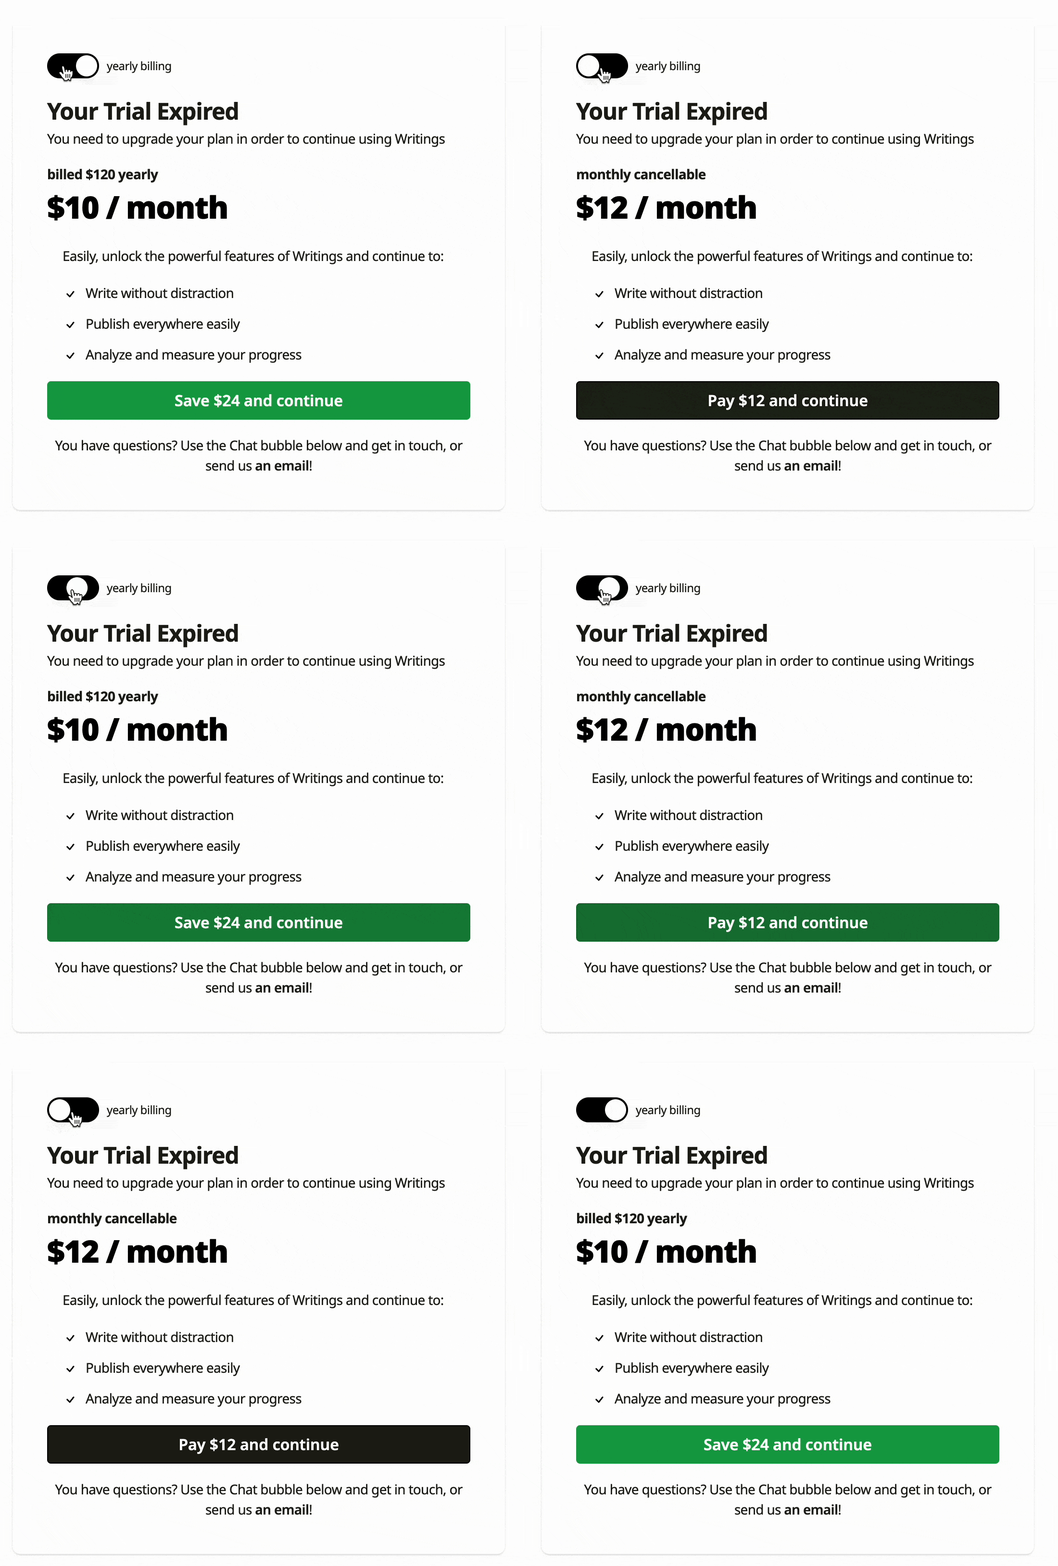
At this point, you wonder, why I didn't do it. Because I wanted to align what shows in the App with what shows on the landing page. Here is the upgrade page on Writings:

As you can see, when the switch button is toggled, the price and some of the copy change—showing the differences between annual and monthly billing accordingly. I found the look for this kind of pricing table somewhere on Dribbble or Pinterest. So I copied it.
The Pricing Table
It is split into two halves. The Left and the Right one. 🤷
Add a container.
Select type → Columns (50% left, 50% right).
The Left Side
In the left column, I added 6 Text elements, for the title, description, and 4 benefits you get with the Pro version.
A cool trick I learned by reading some guides on styling Carrd is that you can technically style any element as you wish. For example, as you can see the benefits items start with the Unicode check character ✓. To make the check look like a circle with a gray background, you can use the highlight markdown annotation for the checkbox only (==✓== ) and continue with the text you want to show next to it.
For example, my first item it's: Write without distractions. So the whole value of the Text element is:
\==✓== Write without distractions.
Now the tiny detail to style the highlight was a new thing I learned. I selected the Text Element and went to Settings (the gear icon) → Text: Highlight. And I added this style:
padding: 1px 6px 1px 5px;
border-radius: 50%;
margin-right: 1rem;
This made the highlight look like a circle. A basic CSS trick.
The Right Side
The right side of the table is more interactive as you see, as it reacts to the click of the annual/monthly pricing. When the annual is turned on, the rules that apply to this billing method show (mainly, the discount). But how can we incorporate something interactive on our Carrd page?
Easy: by using the Embed element.
The idea I had was: if I build a checkbox in plain HTML (so HTML and CSS only, no tailwind, nothing), then I will try to embed it to my page by using the Embed element.
I did that. I created one index.html and started experimenting there. I didn't reinvent the wheel, but I found a tutorial on creating a switch button with text next to it with pure HTML and CSS. Then I adopted it to fit my case.
This is the HTML code I used to show the toggle with a label next to it:
<div id="togglemain" class="togglemain">
    <label class="toggle">
        <input id="toggleswitch" type="checkbox">
        <span class="roundbutton"></span>
    </label>
    <div class="title"><span id="status">yearly billing</span></div>
</div>
And the CSS style so that it matches the colors and forms I want:
<style>
    .togglemain {
        font-size: 1.2rem;
        font-family: sans-serif;
        padding: 0rem 0 0rem 0rem;
        align-items: center;
        display: flex;
    }

    .title {
        color: black;
        margin-left: 1rem;
    }

    .toggle {
        margin: 0;
        position: relative;
        display: inline-block;
        width: 4rem;
        height: 2.4rem;
    }

    .toggle input {
        display: none;
    }

    .roundbutton {
        position: absolute;
        top: 0;
        left: 0;
        bottom: 0;
        right: 0;
        width: 100%;
        background-color: #33455e;
        display: block;
        transition: all 0.3s;
        border-radius: 3.4rem;
        cursor: pointer;
    }

    .roundbutton:before {
        position: absolute;
        content: "";
        height: 2.0rem;
        width: 2.0rem;
        border-radius: 100%;
        display: block;
        left: 0.2rem;
        bottom: 0.2rem;
        background-color: white;
        transition: all 0.3s;
    }

    input:checked+.roundbutton {
        background-color: #6bc8fe99;
    }

    input:checked+.roundbutton:before {
        transform: translate(1.4rem, 0);
    }
</style>
And finally, the code that will manipulate the shown elements in context of the state of the switch.
Important to pay attention to is the position of the switch element. As the DOM is rendered, in case you want to apply a function to an element that is not yet rendered, it will fail gracefully (nothing bad will be shown, but it won't work).
As I wanted the switch button to manipulate the text above, I added it after those Text elements were rendered. When I say after I mean, beneath it (as a position). Seeing the page, it looks as if the change is performed over the same element. But it isn't. I am playing with the visibility of the prices. Technically I have two elements: one for the monthly, and one for the annual price.
When the switch is off, the first element is shown, for the monthly price, and when it's on, the one for the annual price is shown. You can play with this as much as you want and need.
Here is how to do so:
<script>
    var input = document.getElementById('toggleswitch');
    var outputtext = document.getElementById('status');
    input.checked = true;
    var monthlyPrice = document.getElementById('priceMonthly');
    var annualPrice = document.getElementById('priceYearly');

    monthlyPrice.style.display = 'none';

    input.addEventListener('change', function () {
        if (this.checked) {
            outputtext.innerHTML = "yearly billing";
            monthlyPrice.style.display = "none";
            annualPrice.style.display = "block";
        } else {
            outputtext.innerHTML = "monthly billing";
            monthlyPrice.style.display = "block";
            annualPrice.style.display = "none";
        }
    });
</script>
If however, you need to do the change over elements that are rendered later in the tree, you can use the onload event from the window so that you establish the onchange listeners.
I haven't tried this but If you need to have the toggle at the top (and the pricing details changing underneath) you can try it.
All of these sections (the div, the style and the script) can be pasted directly into the Embed element. Select Code as Type for the Embed and at the bottom, in the Code input, paste the code described above.
The page has to be published for you to see the results.

